*This post may contain affiliate links for which I earn commissions.*
A beginner-friendly keepsake that teaches simple hemming and celebrates cherished memories
The Smallest Stitches and Projects Bring Meaning
There’s something sweet and extra special about creating something little but lasting—a scrap of fabric can carry memories, caring, and warmth. If you have ever wanted to make something sentimental and useful, an easy-to-sew reversible fabric coaster is a great place to start.
This project is very quick to put together and sew. It will build your confidence if you are new to sewing, and it has lots of possibilities. You can have each side of the coaster tell a story: one fabric side might remind you of a loved one or very close friend, and the other side can bring a lovely touch of beauty to the table.
In this tutorial, you will learn how to sew a reversible fabric coaster—this is a beginner-friendly, quick project that teaches basic cutting, ironing, and hemming and provides a way to honor a loved one by preserving a fabric scrap that brings memories of them, or simply brings a handmade touch to your home.
Why This Quick and Easy Project Matters
It is easy to think small projects do not have much of an impact—but they certainly do. A fabric coaster might be simple, yet every stitch carries intention. You can:
- Repurpose a loved one’s favorite dress fabric or shirt.
- Gift a set of these lovely, reversible coasters to a friend who cherishes handmade items.
- Sew these coasters for senior homes or charity drives because they are a simple way to cheer someone up.
- Keep them for yourself as sentimental reminders that beauty often comes from the simplest things.
I like to use fabrics tailored to each person’s personality: Flower prints for gardeners, sports-themed fabrics for the athlete, plaids for a cozy feel.
Creating something meaningful is not about sewing something perfect. Handmade is one-of-a-kind.
Choosing Your Fabrics: Where Memory Meets Creativity and Design
At the start of this project, take a moment to choose fabrics that make your heart happy. Two coordinating fabrics are needed for a reversible coaster, one piece for each side.
Ideas to consider:
- A square cut from a sentimental fabric, such as a child’s baby blanket, a loved one’s shirt or even your grandmother’s apron.
- The reverse side can be complementary fabric, like something that matches the décor on your coffee table or in your kitchen, or a themed gift tailored to the recipient’s likes.
Fabric types:
- Cotton is easiest for beginners—it does not stretch and crisply presses.
- Linen has a beautiful texture.
- Scraps of fabric work great, such as quilting scraps, because they are usually already color-coordinated.
💡 Tip: If you are beginning to build your fabric stash, pre-cut fabric charm packs are a lovely, low-stress way to mix and match prints without buying full yards. The colors already coordinate beautifully, and they’re the perfect size for small projects like coasters.
Tools & Supplies You’ll Need
Just the basics are needed for this project:
- Two fabric squares (about 5″ x 5″ each)
- Sewing machine (a simple, beginner-friendly model like the Brother XM2701 sewing machine is wonderful—it is easy to use, lightweight, and reliable)
- Rotary cutter or fabric scissors. Never use your fabric scissors to cut paper or other items, as they will quickly dull. You want your scissors to cut crisp lines.
- Mini iron or regular-sized iron and a wool pressing mat or ironing board
- Fabric clips or straight pins
- Matching thread
- Fusible interfacing, as it provides extra sturdiness and keeps hot or cold liquids from damaging surfaces
You can complete this project with a simple running stitch and a bit of patience if you are hand-sewing.
Learning with this Step-By-Step Process: Simple Hemming & Fabric Turning
This coaster project teaches two wonderful beginner skills: hemming and turning fabric right side out.
You will begin this project by sewing straight seams, pressing the seams neatly, and learning how fabric layers work together. Nothing needs to be perfect—the most important thing is that you learn and create something handmade.
Each time you set down to drink a cup of tea and rest your cup on your coaster, you will be very proud because you made this item. Creating and finishing a heartfelt project is something worth celebrating.
Step-by-Step: How to Sew a Reversible Fabric Coaster
Step 1: Cut Your Fabric
Cut two squares of fabric, each about 5″ x 5″. You can go up to 6″ x 6″ if you prefer a slightly larger coaster; just remember that both pieces should be the same size.
If you are using interfacing for a sturdier coaster, cut it the same size as the coaster fabric.
Press each piece, ironing them and smoothing out wrinkles. Fabric that has been pressed looks more polished and is also easier to sew.
💡 Gentle tip: I love using my mini pressing iron and wool mat for projects of this size. A mini pressing iron fits perfectly between the seams without dragging the fabric and heats of quickly.
Step 2: Layering and Pinning
Place the two fabric squares right sides (pretty sides) together (meaning the pattern sides should face each other).
If using interfacing, place the interfacing on the top of the stack of fabric.
Clip or pin around the edges, be sure to leave a 2″ opening so the fabric can be pulled through for turning later.
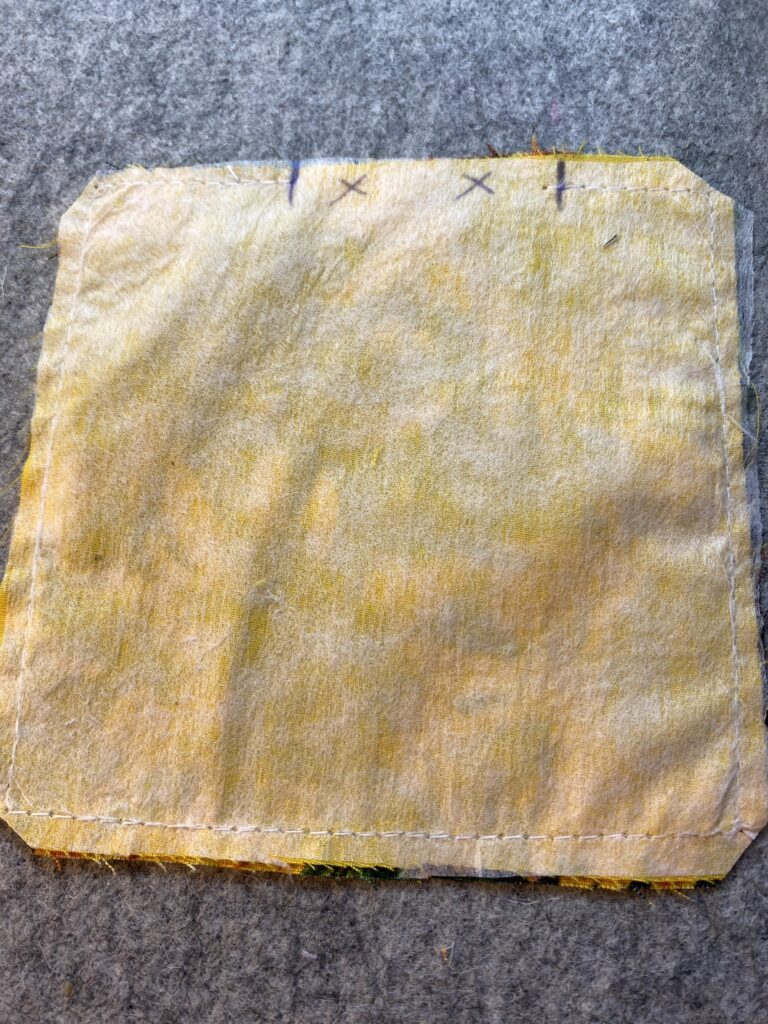
Step 3: Sewing Around the Edges
Using a ¼-inch seam allowance, sew around three sides of the square, but on the fourth side, leaving a 2-inch opening unstitched.
Be sure to backstitch your seams at the start and end of your sewing to keep your seams from unraveling.
💡 Tip: If you are new to using a sewing machine, you can practice on fabric scraps first to get used to the stitch speed and to get a feel for the foot pedal. The Brother XM2701 is a great beginner-friendly sewing machine. It is a wonderful, user-friendly sewing machine to ease into machine sewing.
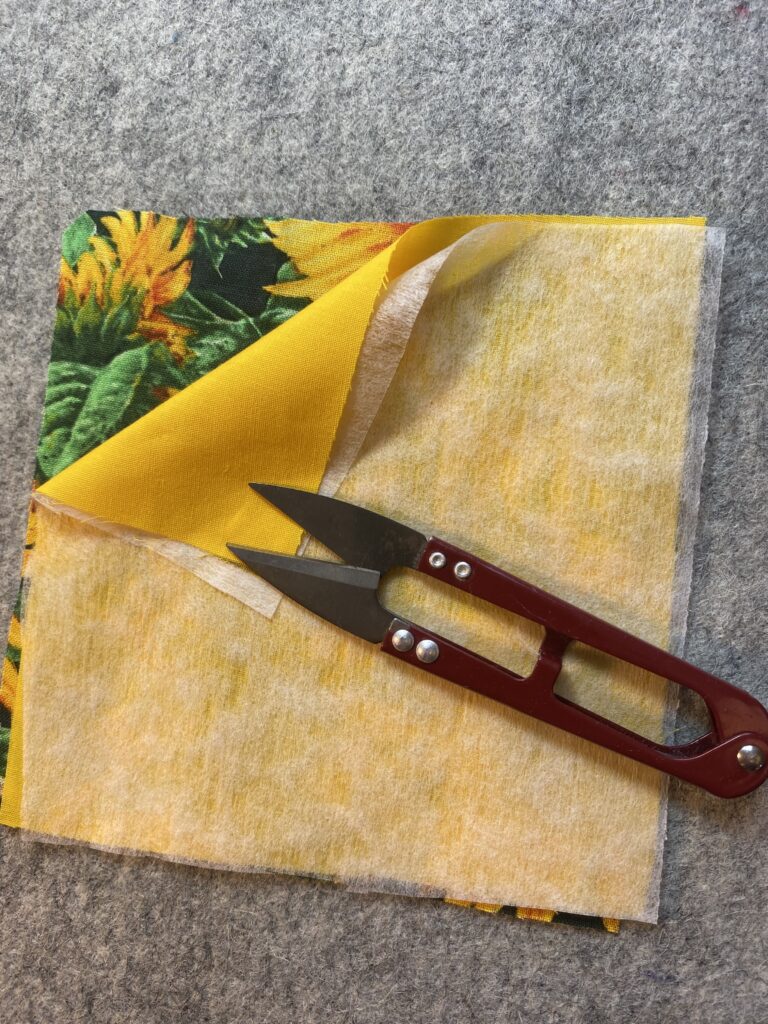
Step 4: Clipping Corners & Turning the Fabric
Without cutting into the stitches, carefully clip the corners diagonally from the stitched corners. The coaster corners will look crisp and clean once turned.
Turn the fabric right side out through the opening. You can use a blunt tool like a pencil or a chopstick to gently push out the corners. Be sure not to use your scissors for turning the corners, as they could poke through your stitched seams.
Press the coaster flat with a mini-pressing iron or regular iron. You will be amazed at the difference pressing makes to give your reversible coaster a finished look.
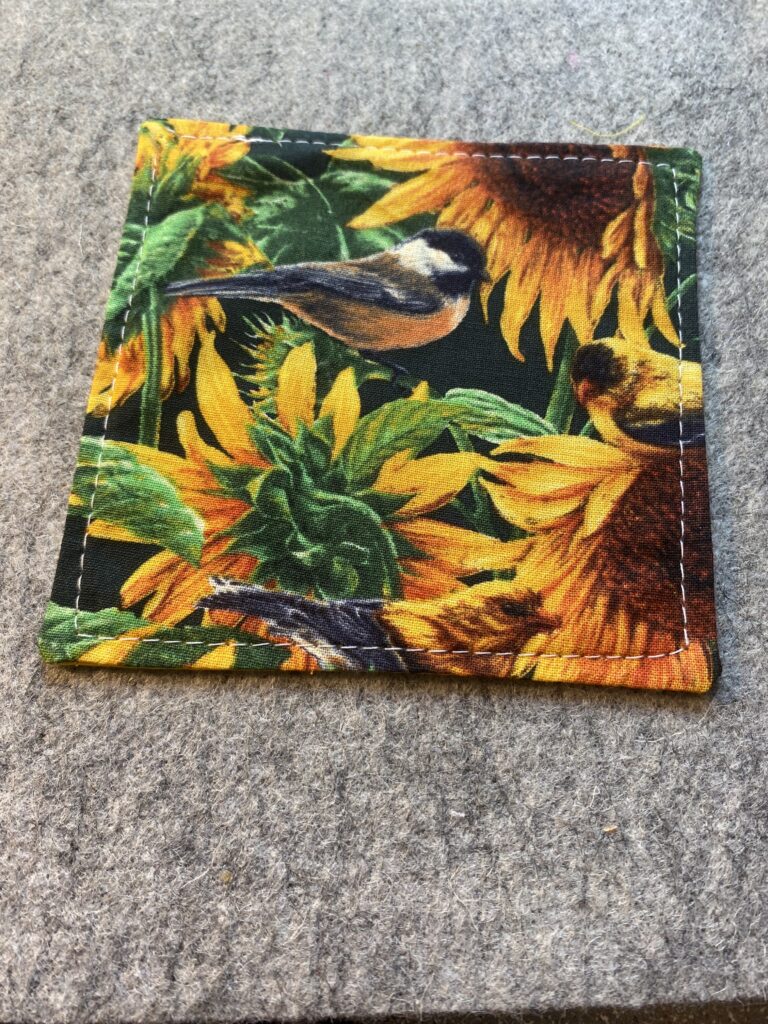
Step 5: Topstitch and Close the Opening
Fold the open edges to the inside of the coaster so they align with the seam. Press again as this detail will make your topstitching look amazing.
Topstitch around the entire coaster about ⅛” from the edge so that it catches in and closes the opening neatly. This will make your coaster stay flat and give it a professional touch. Take your time and enjoy the process. Pivot your needle when you reach each corner and continue sewing to the next corner.
Optional: As a decorative touch, you can add a second row of decorative topstitching about ¼” from the edge.
You have now sewn a reversible coaster! Be creative and have fun.
Meaningful Extra Touches
There is a lot of creative room to make this project extra special:
- Add a hand-stitched label with a date, your initials, or the initials of your loved one.
- Make a set of coasters—using coordinating fabrics with each one representing a special memory or family member.
- Include a gift-give note: If you are gifting a coaster or set of coasters, include a special note such as “A small piece of warmth, handmade with love.”
These little coasters can be tucked into welcome baskets for new neighbors, care packages or donated to charities or church fundraisers.
💡 Tip: If you have a tiny workspace, a mini pressing iron will fit in your tiny workspace and will perfectly press the creases and edges. Be sure to have a pressing mat or ironing board under your work surface so you do not mar the workspace.
A Stitch of Comfort is a Sparkle of Purpose
In approximately an hour or less, you have learned how to sew a reversible fabric coaster using two small pieces of fabric and turning it into something not only beautiful, but heartfelt and useful.
The peaceful joy of sewing can turn an ordinary moment into something deeply heartfelt and personal.
Your coaster is a reflection of love, whether it honors your loved one’s memory or adds comfort and joy to your morning coffee routine.
You only need a willingness to begin and a gentle remember that you do not need perfection.
Grab yourself a warm drink and place your mug on your handmade coaster. That little square of fabric can remind you: what you create matters because it is from the heart.
Optional Next Step
If you enjoyed this project, explore these next: