*This post may contain affiliate links for which I earn commissions.*
Clothing once worn by someone special – dear friend, grandparent, parent – carries their imprint and brings comforting memories. Creating a keepsake such as a handkerchief from their shirt is a special way to begin learning simple stitching skills.
A keepsake handkerchief is the perfect way for beginners to start off with an easy sewing project. No fancy techniques are needed – just a willingness to learn and heartfelt intention. In this project, you will achieve basic hemming skills using fabric that brings you fond memories and emotional comfort. The completed project will be a handkerchief you will treasure always.
You will learn to select, cut, and stitch the handkerchief hem to create a loving keepsake from a well-loved shirt. The keepsake can be kept for yourself, gifted to bring comfort to another person, or tucked away as a sweet memory of the loved one.
When my mother passed away, I kept several of her favorite blouses. She loved bright colors. There was one blouse in particular that she loved to wear when we went for a fun-filled day of shopping and out to lunch. I made that blouse into a beautiful handkerchief that I still carry with me today, even though she has been gone for many years. Just seeing and touching this little piece of fabric grounds me and gives me joy and comfort because it reminds me of all the wonderful times we had together. Just holding it has given me strength during especially difficult times. I hope you find comfort in making a keepsake handkerchief to hold near and dear.
Several Reasons Why a Keepsake Handkerchief Is the Best Project for a Beginner
New sewists should start with a small project so as not to be overwhelmed with complicated patterns or a multitude of steps to follow. This project will teach the necessary skills, such as cutting fabric, pressing folds and hems and sewing the hem. From start to finish, this project is rewarding and emotionally comforting.
Beginner-friendly steps include:
- There will be no large pieces of fabric to manipulate or overwhelming patterns.
- You will learn the fundamental foundation for almost every stitching project which is straight-line stitching.
- You will become skilled at ironing and folding fabric in order to achieve a uniform hem.
- The finished keepsake handkerchief will be special because it will bring comforting memories of your loved one and it was personally made by you.
By creating a handkerchief that holds fond memories of your beloved, you are honoring their story while learning to sew.
Choosing the Correct Shirt and Section of Fabric
To begin your project, you will want to select a shirt taking into consideration the shirt’s condition and the texture of the fabric. The following is a guide to determine if the fabric will be easy to work with:
Beginners best shirt choices:
- Cotton-blend or all cotton shirts: Very easy to fold, press and sew.
- Flannel (lightweight): Soft and cozy, but may fray around the edges prior to hemming.
- Shirts made from linen: Lovely texture, but easily wrinkle.
Stretchy fabrics such as jersey knits should be avoided as a beginning project as they can be a bit of a challenge for beginners.
One the perfect shirt is chosen, you will need to identify a larger fabric section such as a front or back panel. The handkerchief size is usually 10 to 12 inches square for the traditional, basic style. Look at the shirt to determine a square of fabric free from worn sports or stains.
Pressing Tip: Once a 10 to 12 inch square of fabric is chosen, press the fabric and iron out any wrinkles. Pressing fabric prior to cutting will make your measurements more precise and the fabric edges will be sharper.
Hemming, a Gentle Art: Satisfying, Soothing and Simple
Neat and crisp handkerchief edges are part of its charm. A hem is created by folding and pressing the of the fabric once and then folding that edge up, pressing again and stitching along the edge to prevent fraying and to create a neat, crisp hemmed edge. The art of pressing/turning and repeating the process in order to stitch the hem is quite calming.
Two easy hemming alternatives:
- Machine Stitching: Neat, quick and long-wearing. If you are new to using a sewing machine, sewing a hem is a great way to practice a straight stitch.
- Hand Stitching: Although slower than using a sewing machine, this process is very personal and can be emotionally comforting. A small whip-stitch or running stitch near the fabric’s folded edge will give your keepsake handkerchief that handmade warmth and feel.
Perfection is not necessary especially if you are a new sewist as imperfections such as uneven corners or stitches add to its charm. The love and care behind your work is what truly matters.
Step-by-Step Guide: Sewing Your Keepsake Handkerchief
Items you will need:
- A favorite, well-loved shirt
- Rotary cutter with mat or fabric scissors
- Measuring tape or ruler
- Iron and ironing board
- Fabric clips or straight pins
- Sewing machine or hand-sewing needle
- Matching thread
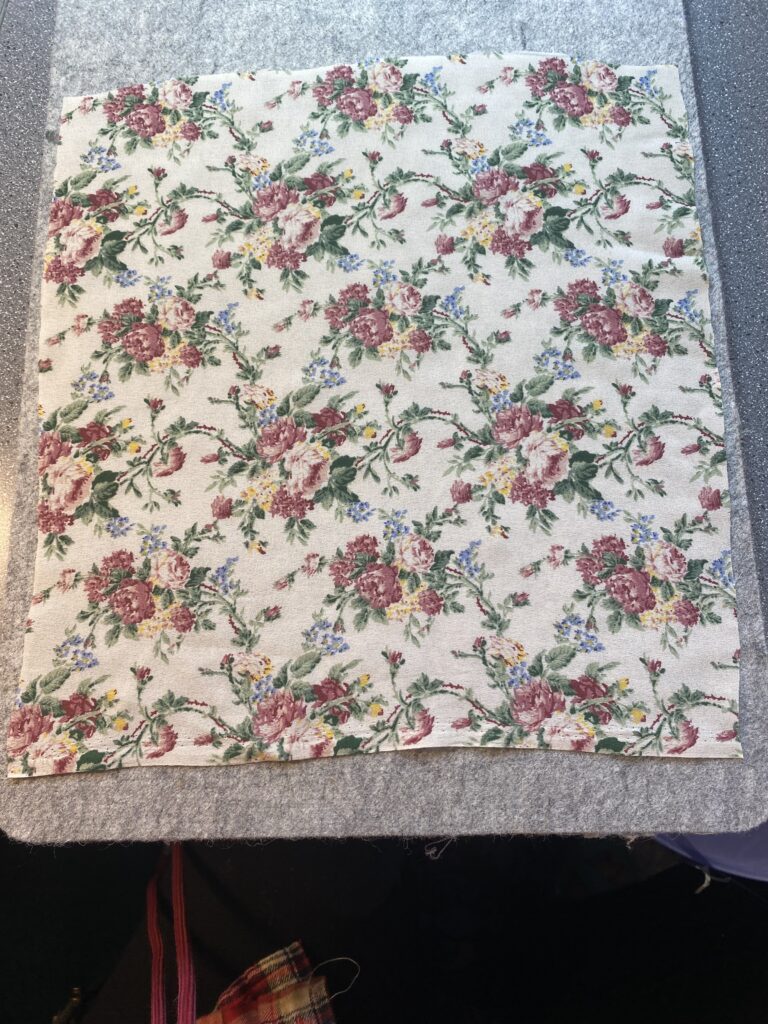
Step 1: Cutting Your Square
Measure and cut a square from the shirt, about 12 inches on each side of the square. You can double the fabric if it is very thin to give it a heavier feel. Press the fabric smoothing out all wrinkles prior to cutting. Keep all edges straight and cut the square of fabric.
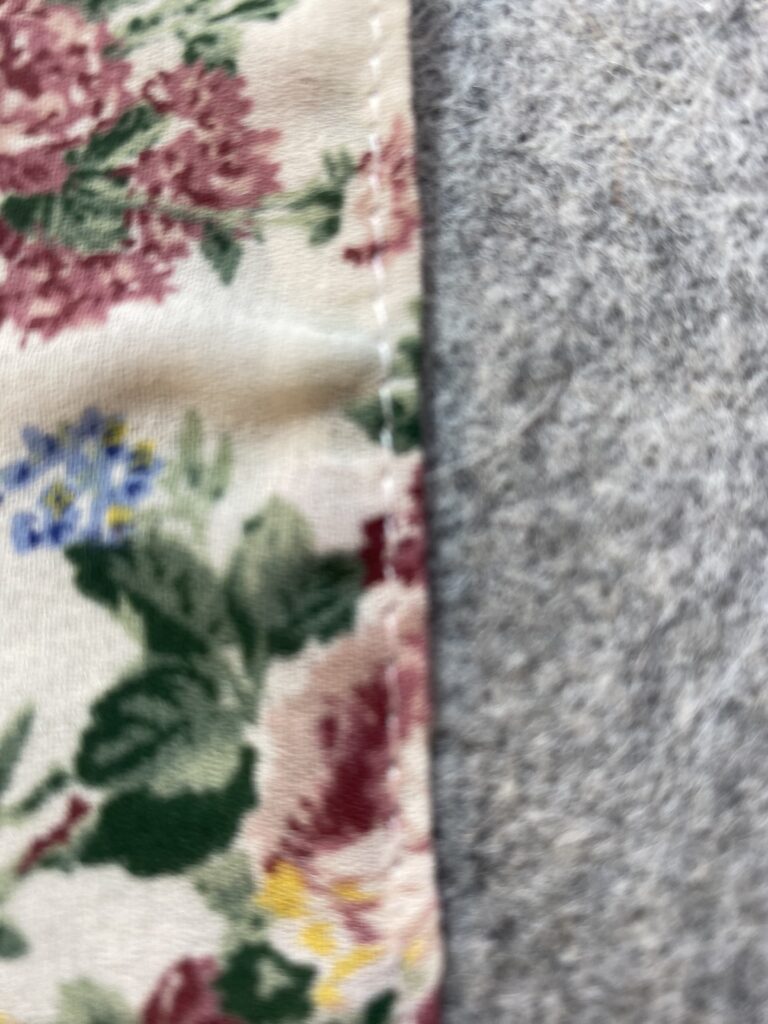
Step 2: Fold and Press the Edges Twice
With right side of fabric facing down, fold each edge of the square over ¼ inch toward the wrong side of the fabric and press flat. The next step is to fold that fold up again another ¼ inch, press, and pin the folded hem in place. By pressing in a “double fold”, the raw edges are neatly tucked inside the fold.
Step 3: Sewing the Hem
- Machine Stitching: Sew about 1/8 inch around all four sides the inner folded edge. At the corners, pivot to turn the corner and continue sewing.
- Hand Stitching: Using small whip stitches or running stitches along the fold hemline of each side. Stitches should be relaxed and even.
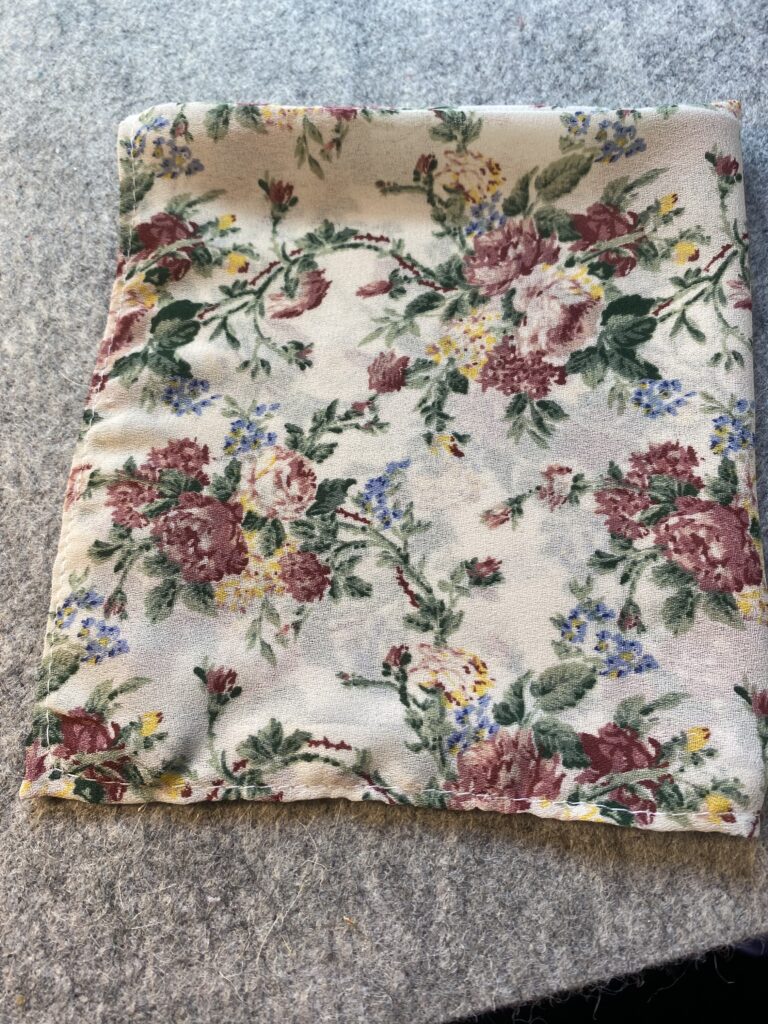
Step 4: Pressing and finishing
Once all sides have been sewed, the handkerchief should be given one last press over the entire surface. Final ironing gives projects professional looking results.
Optional Personalization: You can stitch a tiny embroidered heart or initial in a corner of the keepsake handkerchief as a thoughtful touch to this memorial piece.
Helpful Tools and Gentle Recommendations
Fancy equipment is not needed, but these reliable tools can make projects more enjoyable and the creation process proceed smoothly.
Faye’s gentle favorites:
- ✂️ Fabric Scissors: Fiskars Classic 8″ Sewing Scissors – beginner friendly, sharp, comfortable and affordable.
- 🧵 Entry-Level Sewing Machine: Brother GX37 – this sewing machine makes threading simple and is great for straight-line projects like this one.
- 🔍 Pressing Tool: Clover Hot Hemmer – this tool assists with accurate measuring and pressing hems with ease.
Affiliate note: If you purchase through these links, SewRewarding.com may earn a small commission at no extra cost to you. It helps keep the site running and the projects coming—thank you for your support!
Stitching with Love
Take your time, enjoy the process and envision the fond memories of your loved one.
Each stitch is an act of love as you hold the fabric and reminisce about the loved one who wore it. There is immeasurable power in this small piece of fabric that carries your creative spirit and entwines their memory. You have turned gratitude and nostalgia into a tangible, keepsake handkerchief.
Holding the completed handkerchief will give you a mix of memories both past and present, and making anew. Sewing isn’t just about cloth or fabric—it’s about real connections. This handmade, keepsake is touchable proof of that.
Conclusion: Meaningful Stitches
If this is your beginning into learning to sew, congratulations—you have just created a truly special keepsake memory honoring a loved one. You have not only learned to cut, press, and hem, but more importantly, you created a tangible keepsake and that is the enormous beauty of sewing with heart.
Hold your handkerchief near you, or gift it to someone who has shared memories. Each time you see or hold it, you will remember that small stitches can carry great amounts of love.
There are many other projects from the heart for beginners. As with learning anything new, the more you do it, the better and more confident you become.
Other small, beginner projects include sewing fabric scraps into mug coasters; create small, patchwork lap quilts for nursing home residents; stitch drawstring bags for foster children or pillowcase dresses for charities to send overseas to underprivileged children.
With just one small stitch at a time, you are creating comfort, kindness and a joyful connection in the world.
💛 You don’t need perfection. You just need heart.